A Complete Guide to Ice Machine Service: Installation, Maintenance, and Why It Matters

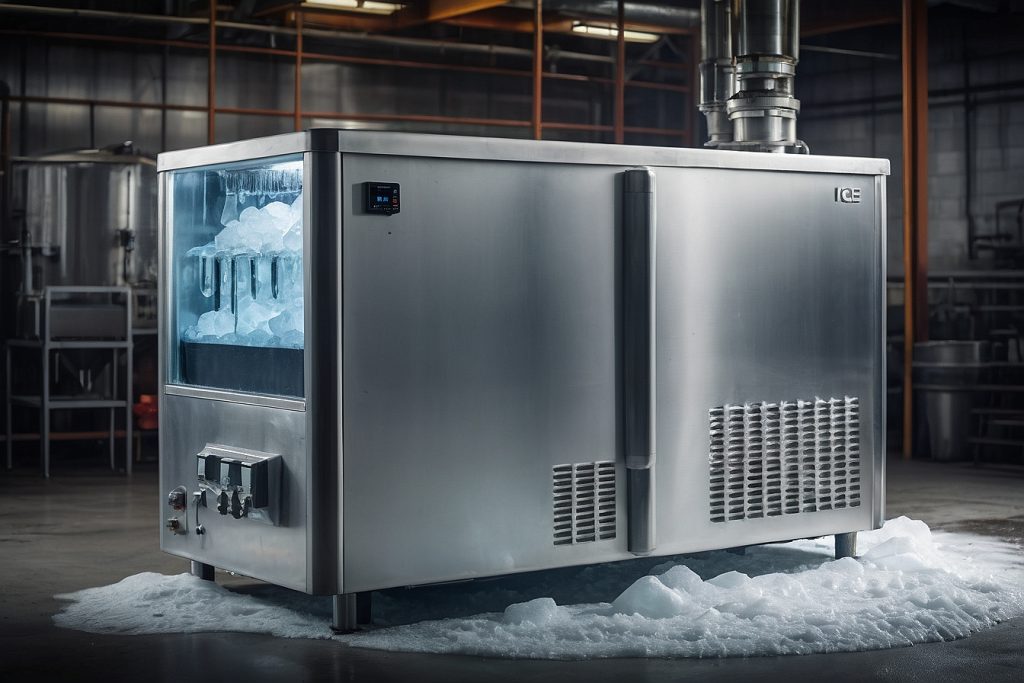
Ice machines are essential for many businesses, especially in industries like hospitality, healthcare, and food service. Whether you’re running a restaurant, a hotel, or a convenience store, a reliable ice machine ensures that your operations run smoothly. However, like any other equipment, ice machines require proper installation, regular maintenance, and occasional servicing to perform efficiently. This article covers the essentials of ice machine service, focusing on installation and maintenance to keep your machine in top condition.

The Importance of Ice Machine Service

An ice machine is a significant investment, and proper servicing ensures that you get the most out of it. Regular maintenance and expert installation can help:

  1. Improve Efficiency: Ensuring the machine runs at peak performance, reducing energy costs.
  2. Extend Lifespan: Proper care can significantly extend the life of your ice machine.
  3. Ensure Hygiene: A well-maintained ice machine prevents the buildup of bacteria and mold, keeping ice safe and clean.
  4. Prevent Downtime: Regular servicing minimizes the risk of unexpected breakdowns, saving your business from operational disruptions.

Ice Machine Installation: Getting It Done Right

Proper installation is the first step toward ensuring the efficiency and longevity of your ice machine. Hiring a professional for this task is essential, as an incorrect installation can lead to operational issues or even void your machine’s warranty.

Steps in Ice Machine Installation

Choosing the Right Location

  • The machine should be installed in a well-ventilated area with easy access to water and power supplies.
  • Avoid placing it near heat sources like ovens or stoves to ensure efficient cooling.

Water Supply and Drainage

  • A steady water supply is essential for the machine to function properly.
  • The drainage system should be capable of handling the machine’s water output to prevent leaks and flooding.

Electrical Setup

  • Ice machines require a dedicated power outlet that matches the voltage and amperage specified by the manufacturer.
  • Professional installation ensures the electrical system is safe and compliant with local codes.

Leveling the Machine

  • Proper leveling prevents vibrations, reduces wear and tear, and ensures consistent ice production.

Initial Testing

  • After installation, the machine is tested to ensure it’s working correctly. This includes checking water flow, ice production, and proper drainage.

Ice Machine Maintenance: Keeping It Running Smoothly

Ice machines require consistent care to operate effectively and produce clean, safe ice. Neglecting maintenance can lead to costly repairs, poor ice quality, and even health code violations.

Key Ice Machine Maintenance Practices

Regular Cleaning

  • Clean the ice machine every 3 to 6 months, or more frequently in high-use environments.
  • Use manufacturer-recommended cleaning solutions to remove mineral deposits, mold, and bacteria.

Sanitizing the Machine

  • After cleaning, sanitize all components to ensure the ice remains safe for consumption.

Filter Replacement

  • Water filters should be replaced every 6 months or as recommended by the manufacturer. This prevents mineral buildup and ensures high-quality ice production.

Inspecting Key Components

  • Check the condenser coils, water lines, and evaporator for signs of wear, clogging, or damage.
  • Ensure the fan and compressor are functioning correctly.

Monitoring Ice Production

  • Keep an eye on the quantity and quality of ice produced. Changes in shape, clarity, or output may indicate an issue that requires servicing.

Check for Leaks

  • Inspect water connections and drainage lines regularly to prevent leaks and water damage.

Signs Your Ice Machine Needs Professional Servicing

Even with regular maintenance, some issues require professional attention. Common signs that your ice machine may need servicing include:

  • Unusual noises like grinding or humming.
  • Reduced or inconsistent ice production.
  • Cloudy, misshapen, or foul-tasting ice.
  • Water pooling around the machine.
  • Increased energy consumption or overheating.

If you notice any of these problems, contact an expert in ice machine service to diagnose and fix the issue promptly.

Benefits of Professional Ice Machine Services

  1. Expertise: Professionals are trained to handle complex repairs, ensuring the job is done correctly.
  2. Warranty Protection: Using certified technicians keeps your warranty valid, protecting your investment.
  3. Time and Cost Savings: Professional servicing can identify potential issues early, saving you money on major repairs and reducing downtime.

Conclusion: Prioritize Your Ice Machine’s Care

Whether you’re installing a new ice machine or maintaining an existing one, proper service is crucial to ensure reliable performance and long-term value. A professionally installed ice machine provides a solid foundation for consistent operation, while regular maintenance ensures it stays efficient, hygienic, and problem-free.

By investing in professional ice machine services for installation and maintenance, you not only safeguard your equipment but also enhance your business’s operations and customer satisfaction. Don’t wait for issues to arise—keep your ice machine in top shape today. Visit https://holiday-ice.com/ for all your ice machine needs.

Setting Up the Perfect Patio Bar: Tips for Comfort and Style

A patio bar is the perfect way to elevate your outdoor space, providing a stylish area to entertain guests or simply enjoy a refreshing drink on a sunny afternoon. Whether you have a spacious deck or a small balcony, creating a patio bar that suits your style and needs is easier than you might think. Here’s how to set up a functional and stylish patio bar, with a focus on essential accessories like a patio bar cart, patio bar table, and patio lamps.

1. Choose the Right Location

The first step in setting up a patio bar is selecting the right location. Choose an area with enough space to accommodate a bar cart, seating, and additional accessories. If your patio is smaller, a compact patio bar cart is an excellent solution as it can easily be moved around to suit the space. A bar cart is not only practical but can also serve as a decorative element that complements the rest of your patio’s design.

2. Invest in a Patio Bar Cart

A patio bar cart is an essential item for any outdoor bar setup. These carts come in various sizes and styles, from sleek modern designs to rustic wood finishes. Look for a cart with multiple shelves for storing glasses, bottles, and bar tools. Some carts even come with built-in storage for ice buckets and trays, making them a versatile choice for outdoor entertaining. You can choose a patio bar cart that matches the aesthetic of your outdoor furniture, whether you prefer a minimalist look or something with a bit more flair.

3. Add a Patio Bar Table

A patio bar table is a great addition to any outdoor bar setup. It provides a comfortable spot for your guests to stand or sit while enjoying drinks, and can easily complement your patio bar cart. Choose a patio bar table with a height that suits your needs—typically taller than a standard dining table, it allows for easy access to drinks and snacks. You can opt for a table made from materials that match your existing furniture, such as metal, wood, or wicker, ensuring it blends seamlessly into your patio design.

4. Add the Right Lighting with Patio Lamps

Lighting plays a crucial role in setting the mood and ensuring your patio bar area is inviting, especially when entertaining in the evening. Patio lamps are an ideal choice for creating a warm and inviting atmosphere. Whether you opt for table lamps, standing lamps, or string lights, the right patio lamps can make all the difference. Look for weather-resistant options that can withstand outdoor conditions. Some patio lamps even come with dimming features, so you can adjust the brightness depending on the time of day or the mood you want to create. For a more cozy vibe, consider lantern-style patio lamps or LED string lights draped around the bar area.

5. Personalize with Accessories

No patio bar is complete without a few personal touches. Add cushions to your seating area for extra comfort, and consider decorative items like plants, colorful glassware, or a stylish drink dispenser. These small details will make your patio bar feel inviting and unique, perfect for hosting friends or enjoying a quiet evening alone.

Conclusion

Setting up a patio bar is an easy and enjoyable project that can transform your outdoor space into an ideal entertaining area. By incorporating a patio bar cart, adding a patio bar table, and enhancing the space with functional and stylish patio lamps, you can create a space that’s both beautiful and practical. Whether you’re hosting a party or relaxing with a drink, your patio bar will quickly become the heart of your outdoor living area.

Roof TLC: 8 Easy DIY Tips to Keep Your Roof Going Strong

Let’s be real—most people don’t think twice about their roof… until it leaks. But here’s the thing: a little love goes a long way. Your roof protects everything underneath it, and keeping it in good shape doesn’t need to be expensive or complicated.

We’ve seen too many roofs fall apart way before their time—all because of simple neglect. But don’t worry, you don’t have to be a tradie to keep things in check. Just a bit of time, some basic tools, and a few smart moves will have your roof thanking you. Need a quick refresher? Here’s a solid resource on

tips for climbing ladders safely

.

Let’s dive into the easiest ways to keep your roof strong, safe, and standing tall.

1. Do a Quick Check Twice a Year

Your roof talks—it just doesn’t speak. Give it a good look twice a year, ideally in spring and before winter.

Grab some binoculars or safely get up to roof level and check for:

  • Cracked or missing tiles
  • Rust spots
  • Loose flashing
  • Sagging or puddles of water

Catching these early means fewer headaches down the line. If you’re unsure where to start, take a look at

how clogged gutters damage roofs

.

2. Keep Your Gutters Clean

Clogged gutters = trouble. Water backs up, spills over, and seeps into places it shouldn’t. That’s how rot starts.

Here’s your game plan:

  • Pop on some gloves
  • Scoop out debris with a gutter scoop or old spatula
  • Hose them out for good measure

🔁 Do this every season:

Season Gutter Task
Autumn Clear leaves and twigs
Winter Check for ice buildup
Spring Flush with a hose
Summer Look for rust or wear

This one’s easy and super effective. For more details, check out

roof maintenance for beginners

.

3. Trim Those Tree Branches

That shady tree over your roof? It might be doing more harm than good. Leaves clog gutters, branches scratch tiles, and rodents love using them as a runway.

If a branch hangs within a metre of your roof, trim it back. Just make sure:

  • The ladder’s steady
  • The day’s dry
  • You don’t cut too close to the trunk

You’ll be amazed how much this one step helps.

4. Show Moss Who’s Boss

Moss and algae might look harmless, but they trap moisture—and moisture is your roof’s worst enemy.

Here’s a gentle way to clean it:

  1. Use a soft broom to brush off loose moss
  2. Mix 50/50 water and white vinegar
  3. Spray it on the mossy spots
  4. Let it sit for 30–60 minutes
  5. Rinse with low-pressure water

Skip the pressure washer. It can do more harm than good.

5. Replace Broken or Slipped Tiles Fast

One broken tile is all it takes for water to sneak in. Don’t wait.

Here’s the fix:

  • Slide the broken tile out
  • Slot in the new one
  • Gently tap it with a rubber mallet

Pro tip: Step on the bottom third of tiles to avoid breaking more.

6. Seal the Cracks Before Water Finds Them

Spotted a small crack or a tiny gap around a skylight or chimney? Don’t ignore it.

All you need is some roofing sealant or silicone caulk. Seal up:

  • Minor cracks
  • Flashing edges
  • Tiny leaks

A five-minute fix now could save you thousands later.

7. Let Your Roof Breathe

Good airflow in your roof space prevents mold, moisture, and rot.

Take a peek:

  • Are there vents at the eaves and ridge?
  • Are they blocked by insulation or debris?
  • Can air move freely in the roof cavity?

If airflow’s poor, call in an expert. Better ventilation = a longer-lasting roof.

8. Check Things After a Storm

Wind, hail, and heavy rain can quietly wreck your roof. After any big storm:

  • Walk around the house and inspect from different angles
  • Look for debris or loose flashing
  • Check your ceilings for damp patches or stains

Act fast on what you find. Quick response = easy fix.

🚨 Roof Trouble? Watch for These Signs:

  • Moss or algae
  • Cracked or broken tiles
  • Gaps in flashing
  • Overflowing or clogged gutters
  • Exposed underlayment

If you spot any of these, it’s time to grab your tools—or call in a pro.

In a Nutshell: DIY Roof Maintenance Checklist

✅ Inspect twice a year
✅ Clean your gutters every season
✅ Trim nearby branches
✅ Clear moss and algae
✅ Replace damaged tiles
✅ Seal up small cracks
✅ Ensure roof ventilation
✅ Check after storms

These steps aren’t about being perfect. They’re about being proactive. A little time now saves a lot of stress later.

And hey—if something’s out of your league, we’ve got your back. At Smile Roofing, we’re always here to lend a hand. Because nothing beats a solid roof over your head—and a little peace of mind to go with it.

FAQs—Quick Answers for Your Roof Worries

Q: How often should I check my roof?
Twice a year, plus after any big storms.

Q: What are the signs my roof needs attention?
Cracks, missing tiles, blocked gutters, moss, water stains on the ceiling.

Q: Can I handle roof maintenance myself?
Yes! Just follow safety steps and stick to the basics. For bigger stuff, call a pro.

Q: What tools do I need?
Ladder, gloves, scoop, hose, broom, vinegar, sealant, rubber mallet—and safety shoes!

Q: Is moss really a problem?
Yep. It holds moisture and can slowly wreck your roof. Remove it gently and stay on top of it.

Effortless Relocation: Your Ultimate Guide to Casselberry Mover

Casselberry Residential Movers

Relocating to a new home or office can be an exciting, yet challenging process. The thought of packing up all your belongings, coordinating logistics, and ensuring everything arrives safely at your new destination can often feel overwhelming. That’s where the expertise of professional movers comes into play. If you’re planning a move in or around Casselberry, Florida, finding the right moving company is essential to ensuring a smooth transition. This guide will walk you through the benefits of hiring Casselberry Mover, how to choose the best moving company, and tips to make your relocation experience as effortless as possible.

Why Choose Casselberry Mover?

Casselberry, located just north of Orlando, is a vibrant community with a mix of suburban charm and urban convenience. Whether you’re moving to Casselberry for its top-rated schools, excellent parks, or proximity to major attractions, it’s important to work with a moving company that understands the area. Hiring local movers in Casselberry offers several advantages:

1. Familiarity with the Area

Local movers are familiar with the layout, traffic patterns, and best routes to take within the city. This knowledge allows them to plan an efficient route, saving you time and reducing the likelihood of delays. Additionally, if your new home is in a neighborhood with narrow streets or challenging access points, local movers will know how to navigate these obstacles seamlessly.

2. Personalized Service

Local moving companies in Casselberry are typically smaller, family-owned businesses that prioritize personalized customer service. When you hire a local mover, you can expect a level of care and attention to detail that larger, national companies may not offer. Whether you need specific items packed or require assistance with tricky furniture, a local moving company can cater to your unique needs.

3. Cost-Effective

Hiring a local moving company can also save you money. Since the movers are based in the area, transportation costs are often lower, and you’re not paying for long-distance travel time or fuel charges. Additionally, many local movers offer competitive pricing and flexible packages that can fit your budget.

Long-Distance Movers Casselberry

Benefits of Hiring Professional Movers

While some people may choose to take on the task of moving themselves, there are significant benefits to hiring professional movers. Here’s why enlisting the help of Casselberry mover can make your move much easier:

1. Expert Packing and Handling

Packing can be one of the most time-consuming and challenging parts of moving. Professional movers are skilled in packing items efficiently and securely. They have the necessary packing materials and techniques to protect fragile items, electronics, furniture, and more. Their experience ensures that your belongings are packed properly to minimize the risk of damage during transport.

2. Efficient Loading and Unloading

When it comes to heavy lifting and proper loading, professional movers are well-equipped. They have the proper tools, such as dollies, ramps, and straps, to move your items safely. Moreover, they understand how to load a moving truck to ensure that everything fits securely and arrives in one piece.

3. Time-Saving

One of the biggest advantages of hiring movers is the amount of time you save. Packing, loading, driving, and unloading all require significant effort and time. By hiring a moving company, you can sit back and relax while the professionals handle the logistics. This allows you to focus on other important aspects of your move, such as settling into your new home or office.

4. Insurance and Protection

Accidents can happen during a move, and items may get damaged or lost. Most professional moving companies offer insurance options to provide coverage for your belongings. This added protection gives you peace of mind knowing that your items are in good hands.

Relocating doesn’t have to be a stressful experience, especially when you have the right movers by your side. With the help of professional Casselberry mover, you can enjoy a seamless, hassle-free move. From packing and loading to transporting and unloading, these experts will ensure your belongings arrive at your new location safely and on time. By choosing a reputable moving company, you can make your relocation an effortless experience, allowing you to settle into your new home or office with ease.

Casselberry Moving And Storage

Unlocking the Mysteries of Wall Panel Costs: Your Ultimate Guide


Unlocking the Mysteries of Wall Panel Costs: Your Ultimate Guide

Wall panels have become increasingly popular as a stylish solution to elevate the aesthetics of any space. They provide essential benefits such as insulation and soundproofing, making them a smart investment for both residential and commercial environments. Whether you’re renovating a cozy living room or optimizing a bustling office, understanding wall panel costs is crucial for effective budget management. This comprehensive guide will explore the dynamics of wall panel pricing, allowing you to navigate your options with confidence and creativity. Before making your final decision, consider reviewing the latest trends in

material options

.

Decoding the Factors that Shape Wall Panel Costs

Wall panel costs can vary significantly, typically ranging from $10 to $100 per square foot. A variety of critical factors influence these prices, including the materials selected, design choices, and installation requirements.

Material Options That Impact Wall Panel Costs

The material you choose for your wall panels will greatly influence your overall investment. Here’s an in-depth look at popular options:

Wood Panels:

  • Pros: Wood panels radiate natural beauty, warmth, and durability. They offer a timeless look that can elevate any space.
  • Cons: However, they can be expensive, and if not maintained properly, they are prone to warping and damage.

Vinyl Panels:

  • Pros: Vinyl panels are often more affordable; they are easy to clean, resistant to moisture, and available in a wide range of styles to suit various decor themes.
  • Cons: On the downside, vinyl may lack the elegance and warmth that natural wood provides.

Metal Panels:

  • Pros: These offer a sleek, modern aesthetic and are fire-resistant, adding both style and safety to your environment.
  • Cons: Metal panels typically have a higher initial cost and can create a colder appearance if not paired with warm design elements.

Navigating Style Choices and Their Effect on Wall Panel Costs

The design of the wall panels you choose will significantly shape the visual appeal of your space, as well as the associated costs. Here are some style considerations to keep in mind:

Textured Panels:

  • Textured designs provide depth and character to your walls but tend to be pricier due to additional manufacturing processes involved in their production.

Custom Designs:

  • Custom panels tailored specifically for your space can dramatically enhance design unity. However, they generally carry a premium price tag, making them a worthy investment for unique projects.

Pre-fabricated Panels:

  • Pre-fabricated options are more budget-friendly, offering simpler designs that may suit straightforward needs but may also limit your creative flexibility.

Installation: A Crucial Component of Wall Panel Costs

Beyond materials and styles, installation costs play a significant role in your final budget. Here are aspects to consider:

DIY vs. Professional Help:

  • Taking a DIY approach can save costs if you have the necessary skills and tools. However, hiring professionals ensures quality workmanship, which may be worth the investment for intricate designs.

Local Labor Rates:

  • Labor rates can vary significantly by region. It’s important to research local averages to get a realistic understanding of expected labor costs in your area.

Complexity of Installation:

  • If your chosen panels have intricate designs or require precision, you may need specialized labor, which can increase your total installation costs.

Preparing Your Budget for Wall Panel Costs

Planning a budget that aligns with your vision is vital. Here’s how to navigate this effectively:

Tips for Research and Comparison

Before committing to any purchases, engage in thorough research:

  1. Visit Local Showrooms: Experience materials firsthand to gauge quality and style.
  2. Request Samples: Validate designs and finishes before making any decisions.
  3. Compare Multiple Suppliers: Obtaining multiple quotes can help you find the best deals in terms of quality and price.

Consider Long-Term Benefits Over Short-Term Savings

When evaluating wall panel costs, it’s essential to weigh the long-term benefits against initial expenses. Opting for quality options can lead to reduced maintenance costs, enhanced durability, and better overall performance over time. When evaluating your options, it’s wise to consult experts in

wall panel

.

Setting Realistic Expectations

Knowing what you want and keeping these aspects in mind is crucial:

  • Visual Aesthetic: Determine your preferred style and vibe.
  • Budget Constraints: Establish clear budget limits to avoid overspending.

Additional Cost-Related Considerations

When planning your wall panel project, keep an eye out for possible additional costs, such as:

  • Wall Preparation: Repairs may be necessary before installation, such as fixing drywall or addressing mold issues.
  • Finishing Touches: Additional expenses for trims, paint, or hardware can add up quickly.

Frequently Asked Questions About Wall Panel Costs

What is the average wall panel cost per square foot?

  • The average wall panel cost per square foot ranges widely from $10 to $100, depending on material and style.

Are cheaper wall panels less durable?

  • Generally, yes. Cheaper options may not provide the same longevity or performance as premium materials.

What is the most cost-effective material forwall panels?

  • Vinyl panels are often regarded as the most budget-friendly choice, offering adequate aesthetics combined with low maintenance needs that make them suitable for various applications.

Can I install wall panels myself?

  • Yes, you can certainly install wall panels yourself if you have the necessary skills and tools. However, it’s wise to assess whether professional installation would save time and ensure high-quality results, especially for more complex designs.

How do wall panel costs compare to traditional drywall?

  • While traditional drywall installation can be more cost-effective initially, wall panels often provide added benefits such as better insulation and enhanced aesthetics that can justify higher costs in the long run.

Is there a way to reduce installation costs?

  • To manage installation costs effectively, consider scheduling installations during off-peak seasons when labor rates may be lower. Additionally, bundling services with other home improvement projects can sometimes lead to discounts.

The Importance of Quality Over Price

When determining the right wall panels for your project, consider that the best choice often balances quality and budget. Investing upfront in quality materials can yield longer-lasting results, ultimately saving you money through reduced maintenance and replacement costs. As you compare options, remember the importance of durability and performance, particularly in areas of your home that experience high traffic or moisture exposure. Keep in mind that your choice of

installation costs

can significantly impact your overall costs.

Conclusion

Wall panels represent a beautiful and functional solution to enhance the aesthetics of any space while providing insulation and soundproofing benefits. Understanding the factors that influence wall panel costs — including materials, design choices, and installation requirements — will empower you to make informed decisions that align with your budget and style preferences. As you embark on your wall panel journey, remember to prioritize quality, conduct thorough research, and keep your long-term goals in focus. With careful planning and consideration, you’ll be well on your way to achieving a stunning transformation in your chosen space, poised to enjoy the benefits of your investment for years to come.

Arming yourself with this comprehensive guide on wall panel costs will ensure you navigate the vast array of options with confidence, ultimately resulting in a style that reflects your unique taste and fulfills your practical needs. Happy decorating!

Water Damage Prevention: Understanding the Urgency and Effective Strategies

Water damage can sneak up on homeowners, leading to extensive and expensive repairs. Recognizing how quickly it can occur is vital in protecting your property. This article delves deeper into the swift nature of water damage, effective prevention strategies, and answers to common questions surrounding the topic. Effective water damage prevention starts with regular inspections and necessary repairs to avoid costly disasters.

water safety

The Rapid Onset of Water Damage: A Closer Look

When water invades your living space, it’s essential to understand how fast damage can occur. Both the source and the environment play crucial roles in determining the severity of the situation. Investing in high-quality materials can significantly reduce risks associated with water damage in your property.

property maintenance

The First Fifteen Minutes: A Crucial Time Frame

Water damage can become apparent almost immediately. Within the first fifteen minutes, you might experience:

  • Wet carpets and furnishings
  • Warped wood in furniture and flooring
  • Damp smells permeating the air

By 24 Hours: The Risks Amplify

After 24 hours of untreated water intrusion, the effects can escalate dramatically. Expect the following developments:

  • Mold Growth: Spores can start to proliferate, creating health hazards.
  • Structural Weakness: Walls and ceilings may begin to show signs of sagging or buckling.
  • Increased Damage Costs: The longer you wait, the more expensive the repairs.

One Week Later: The Long-term Consequences

Deciding to postpone addressing water damage can lead to significant issues by the third week:

  • Permanent Structural Damage: Beams may be compromised, requiring extensive repairs.
  • Health Concerns: Persistent moisture can lead to respiratory problems and allergies.
  • Insurance Complications: Neglecting damage can affect your coverage and future claims.

Proactive Water Damage Prevention Strategies

Preventing water damage means taking a forward-thinking approach. Here’s how you can protect your property:

Routine Maintenance Checks

Identify potential issues before they escalate:

  • Inspect plumbing for leaks
  • Examine roofs for missing shingles
  • Ensure gutters are free of debris

Prompt Action in Cases of Water Intrusion

If water intrusion occurs, here’s what you should do immediately:

  • Shut off the water supply to prevent further flooding
  • Take photos for insurance claims
  • Begin drying out affected areas using fans and dehumidifiers

Utilize Professional Services

For severe situations, don’t hesitate to call in water damage experts. They offer:

  • Advanced tools for extraction and drying
  • Expertise to address all aspects of water damage prevention
  • Assistance with insurance claims and follow-up inspections

Common Sources of Water Damage

Recognizing potential sources of water intrusion is essential for effective water damage prevention:

  • Leaking Pipes: Can cause unseen damage behind walls.
  • Flooding: Heavy rainfall can overwhelm drainage systems.
  • Appliance Malfunctions: Washing machines, dishwashers, and water heaters can malfunction and leak. Using dehumidifiers during humid months can reduce the chances of moisture-related damage occurring.mold prevention

FAQ: Water Damage Prevention Insights

Q: What steps can I take to ensure my home is protected from water damage?
To prevent water damage, regularly inspect plumbing, maintain your roof, clear gutters, and install sump pumps in flood-prone areas.

Q: How can I dry out walls and floors after water damage?
Utilize fans and dehumidifiers, and consider removing soaked materials, such as carpets or drywall, to allow better airflow.

Q: Is mold a guaranteed outcome of water damage?
Not necessarily, but without prompt water damage prevention measures, mold can develop within 24 to 48 hours in damp conditions.

Q: Does insurance cover water damage?
Coverage varies based on policy specifics. Often, water damage from sudden accidents (like burst pipes) is covered, while gradual damage (like leaks) may not be.

Q: How can I anticipate risks for seasonal weather changes?
Regularly review your property for potential vulnerabilities, particularly before heavy rainfall or snowmelt, and consider preventive measures like sealing foundations.

Conclusion: The Importance of Water Damage Prevention

Being proactive about water damage prevention is crucial for preserving your home’s integrity and safeguarding your health. This involves implementing routine inspections to identify any potential vulnerabilities, such as leaks or damp spots, which can lead to serious problems if left unaddressed. Taking prompt action in response to any signs of water intrusion not only protects the structure of your home but also helps prevent the development of hazardous mold and mildew that can adversely affect indoor air quality. Additionally, staying vigilant about moisture levels and water sources within your home can save you from costly repairs and health issues down the line. It’s essential to remain informed about the common signs of water damage, such as discoloration on walls and ceilings, musty odors, or dampness in carpets, as these can be early indicators of a larger problem. Remember, your dedicated and vigilant approach today can significantly impact your property’s safety and value tomorrow, ensuring a healthier living environment for you and your loved ones. By consistently prioritizing maintenance and monitoring, you can enjoy peace of mind knowing that you are taking essential steps to protect your home from potential water-related disasters.

From Hard To Soft – Transforming Your Home & Water Quality With The Right Softener System

Woman Drinking Water Pictures | Download Free Images on Unsplash

There’s a significant difference between hard water and soft water that directly impacts your home and quality of life. If you’ve noticed mineral buildup on your faucets, soap that doesn’t lather well, or clothes that feel scratchy after washing, you may be dealing with hard water. Thankfully, by investing in the right water softener system, you can transform your home and improve your water quality. Here’s a comprehensive guide to help you make this important decision. Citation: SoftPro Whole House City Water Softener

First, it’s important to understand what hard water is. Hard water contains high levels of minerals, primarily calcium and magnesium. These minerals can lead to various household issues, including pipe clogs, reduced efficacy of soaps and shampoos, and damage to appliances like your water heater and dishwasher. Soft water, on the other hand, has had these minerals removed, leading to a range of benefits for both your home and health.

To begin your journey toward soft water, start by assessing your current water quality. You can do this by acquiring a water testing kit or hiring a professional to analyze your water. Look for levels of hardness measured in grains per gallon (GPG). Water with 7+ GPG is generally classified as hard and may benefit from softening.

SoftPro Whole House Water Softener System

Next, explore the types of water softener systems available. The most common types include salt-based ion exchange systems, salt-free softeners, and reverse osmosis systems. Salt-based systems are the most effective at removing hardness minerals. However, if you’re cautious about sodium intake or prefer a more eco-friendly option, salt-free systems modify the minerals to prevent buildup without actually removing them. Reverse osmosis systems focus on purifying water by removing a broad range of contaminants but can be combined with a water softener for optimal results.

Once you’ve chosen the type of softener that fits your needs, consider the capacity of the system. It’s important to select a water softener that meets your household’s water usage. Sizes are typically rated by grain capacity, depending on the number of people in your household and your water hardness level. A professional installer can help you assess your needs more accurately.

Installation is often best left to professionals, especially if you’re unfamiliar with plumbing systems. However, some DIY systems are designed for easier self-installation. You’ll want to position the softener near your main water supply line and make sure it’s accessible for maintenance tasks like adding salt or cleaning filters.

After installation, familiarize yourself with the maintenance requirements. Salt-based systems will need regular salt refills, while all systems will require routine check-ups. Monitoring your water quality and adjusting the softener’s settings according to the manufacturer’s guidelines will help keep your system running efficiently.

in addition to

Lastly, enjoy the benefits! With softer water, you may notice a difference in your skin and hair, cleaner dishes, less soap usage, and the elimination of limescale buildup in pipes and appliances. Transforming your home’s water quality with the right softener system not only enhances your living conditions but also extends the life of your plumbing and appliances. Embrace the benefits of soft water today!

From Hard To Soft – Transforming Your Home & Water Quality With The Right Softener System

Woman Drinking Water Pictures | Download Free Images on Unsplash

There’s a significant difference between hard water and soft water that directly impacts your home and quality of life. If you’ve noticed mineral buildup on your faucets, soap that doesn’t lather well, or clothes that feel scratchy after washing, you may be dealing with hard water. Thankfully, by investing in the right water softener system, you can transform your home and improve your water quality. Here’s a comprehensive guide to help you make this important decision. Citation: SoftPro Whole House City Water Softener

First, it’s important to understand what hard water is. Hard water contains high levels of minerals, primarily calcium and magnesium. These minerals can lead to various household issues, including pipe clogs, reduced efficacy of soaps and shampoos, and damage to appliances like your water heater and dishwasher. Soft water, on the other hand, has had these minerals removed, leading to a range of benefits for both your home and health.

To begin your journey toward soft water, start by assessing your current water quality. You can do this by acquiring a water testing kit or hiring a professional to analyze your water. Look for levels of hardness measured in grains per gallon (GPG). Water with 7+ GPG is generally classified as hard and may benefit from softening.

-

Next, explore the types of water softener systems available. The most common types include salt-based ion exchange systems, salt-free softeners, and reverse osmosis systems. Salt-based systems are the most effective at removing hardness minerals. However, if you’re cautious about sodium intake or prefer a more eco-friendly option, salt-free systems modify the minerals to prevent buildup without actually removing them. Reverse osmosis systems focus on purifying water by removing a broad range of contaminants but can be combined with a water softener for optimal results.

Once you’ve chosen the type of softener that fits your needs, consider the capacity of the system. It’s important to select a water softener that meets your household’s water usage. Sizes are typically rated by grain capacity, depending on the number of people in your household and your water hardness level. A professional installer can help you assess your needs more accurately.

Installation is often best left to professionals, especially if you’re unfamiliar with plumbing systems. However, some DIY systems are designed for easier self-installation. You’ll want to position the softener near your main water supply line and make sure it’s accessible for maintenance tasks like adding salt or cleaning filters.

After installation, familiarize yourself with the maintenance requirements. Salt-based systems will need regular salt refills, while all systems will require routine check-ups. Monitoring your water quality and adjusting the softener’s settings according to the manufacturer’s guidelines will help keep your system running efficiently.

-

Lastly, enjoy the benefits! With softer water, you may notice a difference in your skin and hair, cleaner dishes, less soap usage, and the elimination of limescale buildup in pipes and appliances. Transforming your home’s water quality with the right softener system not only enhances your living conditions but also extends the life of your plumbing and appliances. Embrace the benefits of soft water today!

A Career As A Pastry Chef

Who doesn’t like dessert? Absolutely nothing beats completion of a meal or the accompaniment of a cup of coffee like a nice luscious and abundant treat. If you like making them it might be something of interest to you to pursue a career as a pastry chef.

A career in making breads, pies, chocolates, sweet, cookies, ice cream and cake can be a fascinating choice. It can be especially thrilling for the one who loves to put their heart into it.

There is a growing need for food industry professionals and pastry chefs in particular. Cooking schools are devoted to teaching the skills necessary for you to become a part of this exciting and gratifying field.

Becoming a pastry chef requires imagination, patience, and organization and can be enjoyable. You will take terrific pride and gain the personal sense of achievement in measuring, baking and finishing desserts.

There are several instructional paths to choose from fora career in pastry arts:

* Baking and Pastry Certificate

* Associates Degree in Applied Science Culinary Arts

* Bachelor of Arts Degree in Culinary Arts

Selecting the best degree is just part of the goal of seeking to be a pastry chef; having a real aptitude makes a valuable asset in the pursuit of this career goal. On the job experience is great also where you will learn how to maintain and repair commercial food processing equipment and find repair parts quickly at places like this:

Fascinating and rewarding a pastry chef profession can be something to be happy with; not just the reward of having a prestigious career, it is likewise a prettyfinancially well paying career for the right individual.

The possibilities of a pastry chef are as endless as the recipes in which you prepare.

Who doesn’t like dessert? Absolutely nothing beats the end of a meal or the accompaniment of a cup of coffee like anice rich and luscious treat. If you like making themit may be something of interest to you to pursue acareer as a pastry chef.

How Can An Iron Filtration System Revitalize Your Well Water Quality?

This guide will help you understand how an iron filtration system can transform your well water quality, ensuring it is safe and pleasant to use. If your well water has an unpleasant metallic taste, reddish stains, or a foul odor, it could be due to high concentrations of iron. Here’s how an iron filtration system can revitalize your well water:

First, it’s important to recognize the type of iron contaminant in your well water. The two main types are ferrous iron (dissolved) and ferric iron (particulate). An iron filtration system is effective for both types, but you need to choose the right model based on what type you’re dealing with. If you are unsure, a water test will help you determine the iron concentration and its form.

Next, consider the various types of iron filtration systems available. The most common systems include: (do I need an iron filter?)

  • Oxidation filters: These systems use oxygen to convert dissolved iron into a solid form that can be easily filtered out.
  • Water softeners: While they typically focus on removing hardness, some models can also reduce iron levels.
  • Sequestration filters: These prevent iron from precipitating out of the water, using chemicals to keep it in a soluble state.

Installing an iron filtration system in your home can significantly improve the quality of your well water. When you install such a system, be mindful of the following aspects:

  1. Location: Your filtration system should be installed at the point of entry, where your well water first enters your home. This allows the system to treat all water going into your plumbing.
  2. Regular Maintenance: For optimal performance, it is important to maintain your filtration system through routine check-ups and replacing filters as necessary. Schedule these actions based on the manufacturer’s recommendations.

One of the immediate benefits you will experience after installing an iron filtration system is the elimination of unpleasant metallic tastes and odors. Treated water will be clear and free from rust-colored stains, protecting both your clothing and fixtures. You may also find that your appliances perform better, as they will no longer be subjected to iron buildup. (reference: find more)

In addition to aesthetic and performance improvements, having clean, iron-free water can enhance your family’s health. Contaminated water can lead to gastrointestinal issues or other health concerns. By ensuring your water is filtered, you promote better overall well-being for you and your household.

Lastly, it is advisable to conduct periodic water tests to monitor your well water quality even after installation. This will help you ensure that the filtration system is working effectively and continue to enjoy clean and revitalized water from your well.

In the long run, an iron filtration system is an effective solution to enhance the quality of your well water. With appropriate selection, installation, and maintenance, you can enjoy fresh, clean water daily. Resource: Iron Master AIO by SoftPro

Efficiently Select A Reputable Plumbing Professional In Your Area

If you’re a homeowner unfamiliar with plumbing, you’re most likely acquainted with the experience of being charged an arm and a leg for what looks like a basic plumbing repair. If you’d like to prevent this experience again, continue reading for some guidance and tips on how to repair your own pipes.

Think it or not, it is not a great concept to utilize a plunger if your toilet is clogged. Plungers just press whatever is stuck much deeper into the drain. Rather, it is a better idea to use a closet auger. It will do a much better task and is inexpensive.

If you have a foul odor coming from your garbage disposal, this is due to food debris accumulation. You need to put ice cubes, orange peels, and lemon peels into the disposal and run for about 30 seconds.

When facing temperatures under freezing in the winter season it is very important to leave the warm water leaking. This makes sure that the pipes don’t freeze over and conserves you the costly repair work of fixing and or completely changing a broken pipeline. The minor cost of leaking hot water is well worth saving you from that large expense of changing a broken pipeline.

Finishing a leak test after changing or fixing plumbing is crucial to ensuring that you do not wind up with water damage. You should strongly turn the water on and off, so that the pipelines will relocate to their complete degree and the water pressure will max out. Do the test on both cold and hot water!

Don’t start any do-it-yourself plumbing project without having a plan in place. Getting a clear picture early on will make your plumbing task go a lot smoother!

To get ready for the cold weather, properly drain all outside faucet bibs and turn off the water supply to those faucets. A piece of foam taped to the outdoors bib can provide excellent insulation to prevent any remaining water from freezing or splurge for a specialty cover that comes total with velcro closures.

If you are beginning a pipes project due to discolored water, especially black, make certain to have your water tested first instead. There could be a mineral build up in your pipelines or the source of the issue could be even more down the line than you can reach. Most notably you wish to make certain your water is safe for drinking.

If your plumbing pipes need replacing, it takes a few days and you will need to rent a portable restroom and perhaps some temporary fencing to keep people out of the home. You can get both here:

Pipes isn’t as difficult as it can appear, when you have access to great info and guidance about how to tackle fixing your own pipes issues. Next time you have pipes issues in your house, attempt applying the tips from this article and see if you can save some money by fixing it yourself!